Peak Design Pro Tripod Review
The Peak Design Pro Tripod is the most expensive tripod we've used, but it's also the best, with extra features that place it in the “buy-it-for-life” realm.
Our Verdict
Save time. Get access to brief summaries of our reviews so you can browse and make decisions more efficiently.
Pros
- The combination of carbon fiber, aluminum, and stainless steel makes for a durable tripod
- There are three models, so every kind of photographer can get what they want
- The ballhead is easy to use and get used to, even if you haven’t used one before
Cons
- The carbon fiber is durable, but if it breaks, it isn’t easy to fix
- The already expensive tripod doesn’t come with the optional extras
- The price is prohibitive for most users
Technical Details
-
Weight (lb)
4.2 lb (1.9 kg)
-
Dimensions
19.7 in x 3.66 in (50 x 9.3 cm)
-
Notable Materials
Aluminum, Carbon Fiber, Stainless Steel, Thermoplastic Polyurethane (TPU)
-
Manufacturing Country
Vietnam
-
Warranty Information
Full Review
Get up to 10% off Peak Design • Join Pack Hacker Pro
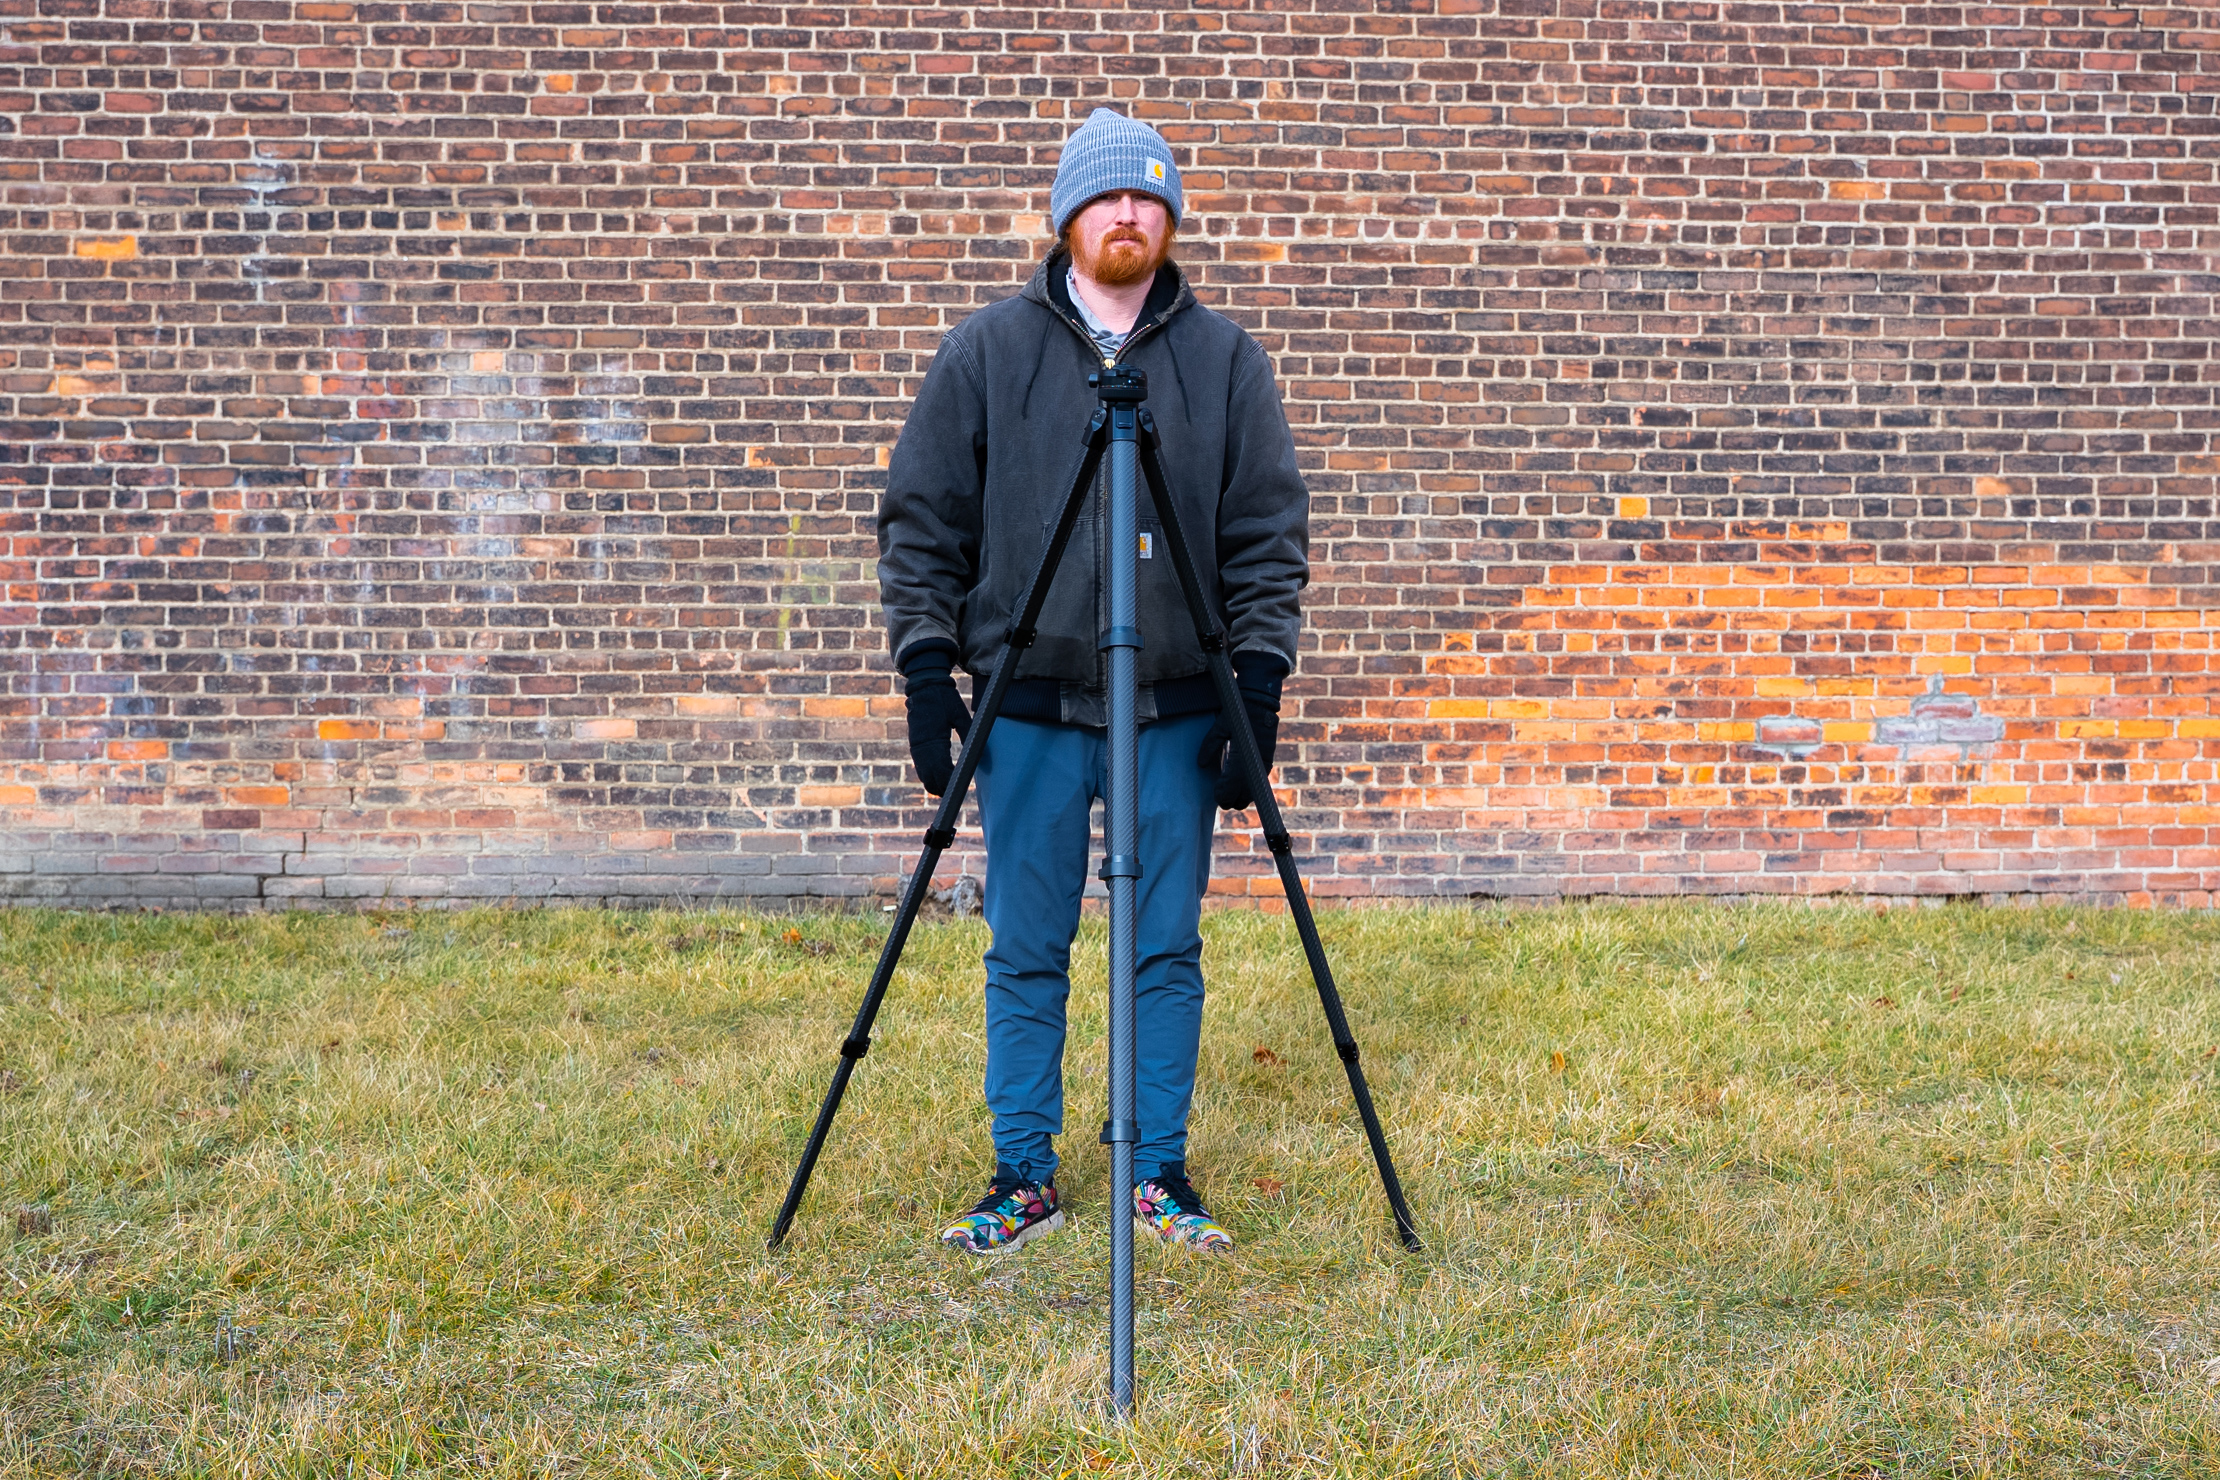
The most crucial word in the Peak Design Pro Tripod’s official name is Pro. This tripod is top-tier all around, from the non-slip feet to the ballhead that makes it easy to shoot both video and crisp photos. Still, it’s larger than other travel tripods we’ve tested before, and the price tag is hard to justify. Are the features worth it, and who is this tripod for? Let’s dive in and find out!
The Rundown
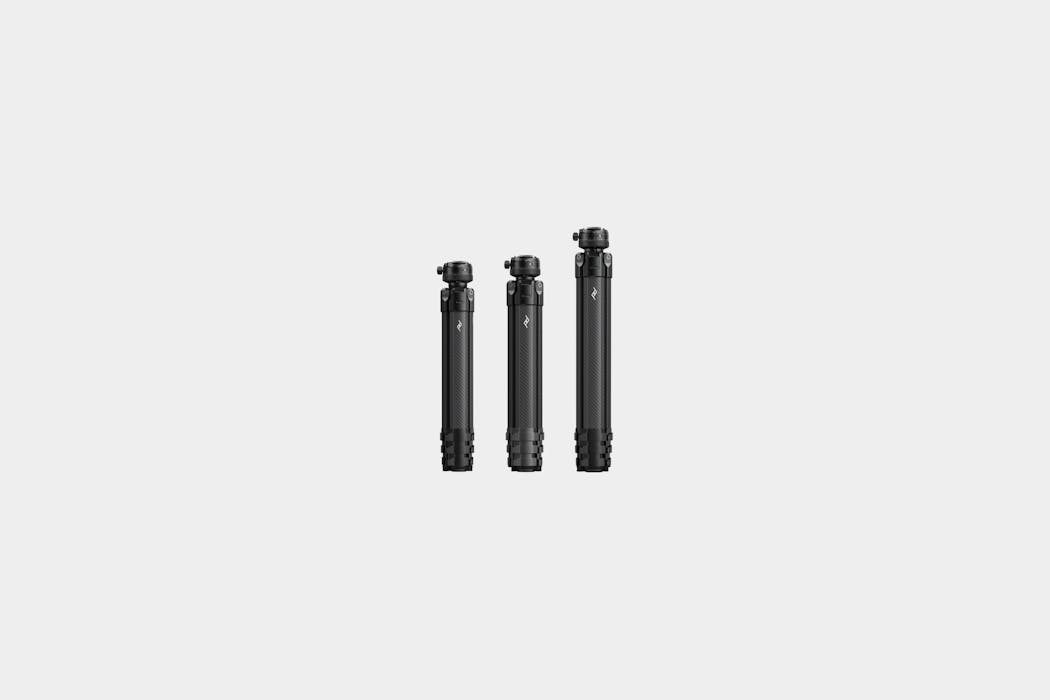
This tripod comes in three sizes. There’s the lighter Pro Lite Tripod, the Pro Tripod (which is what we’re reviewing), and the Pro Tall Tripod, a taller version that adds some extra weight. The Pro Tripod is the standard model, but all three are available and offer benefits. Obviously, if you prefer to shoot from a high angle, the tall model is best suited for you. Or, if you prefer a professional tripod that is a bit lighter weight, so you can get after it on the trail or walk around the city all day without getting too tired. We believe that the standard Pro Tripod strikes the best balance if you don’t require the two additional features.
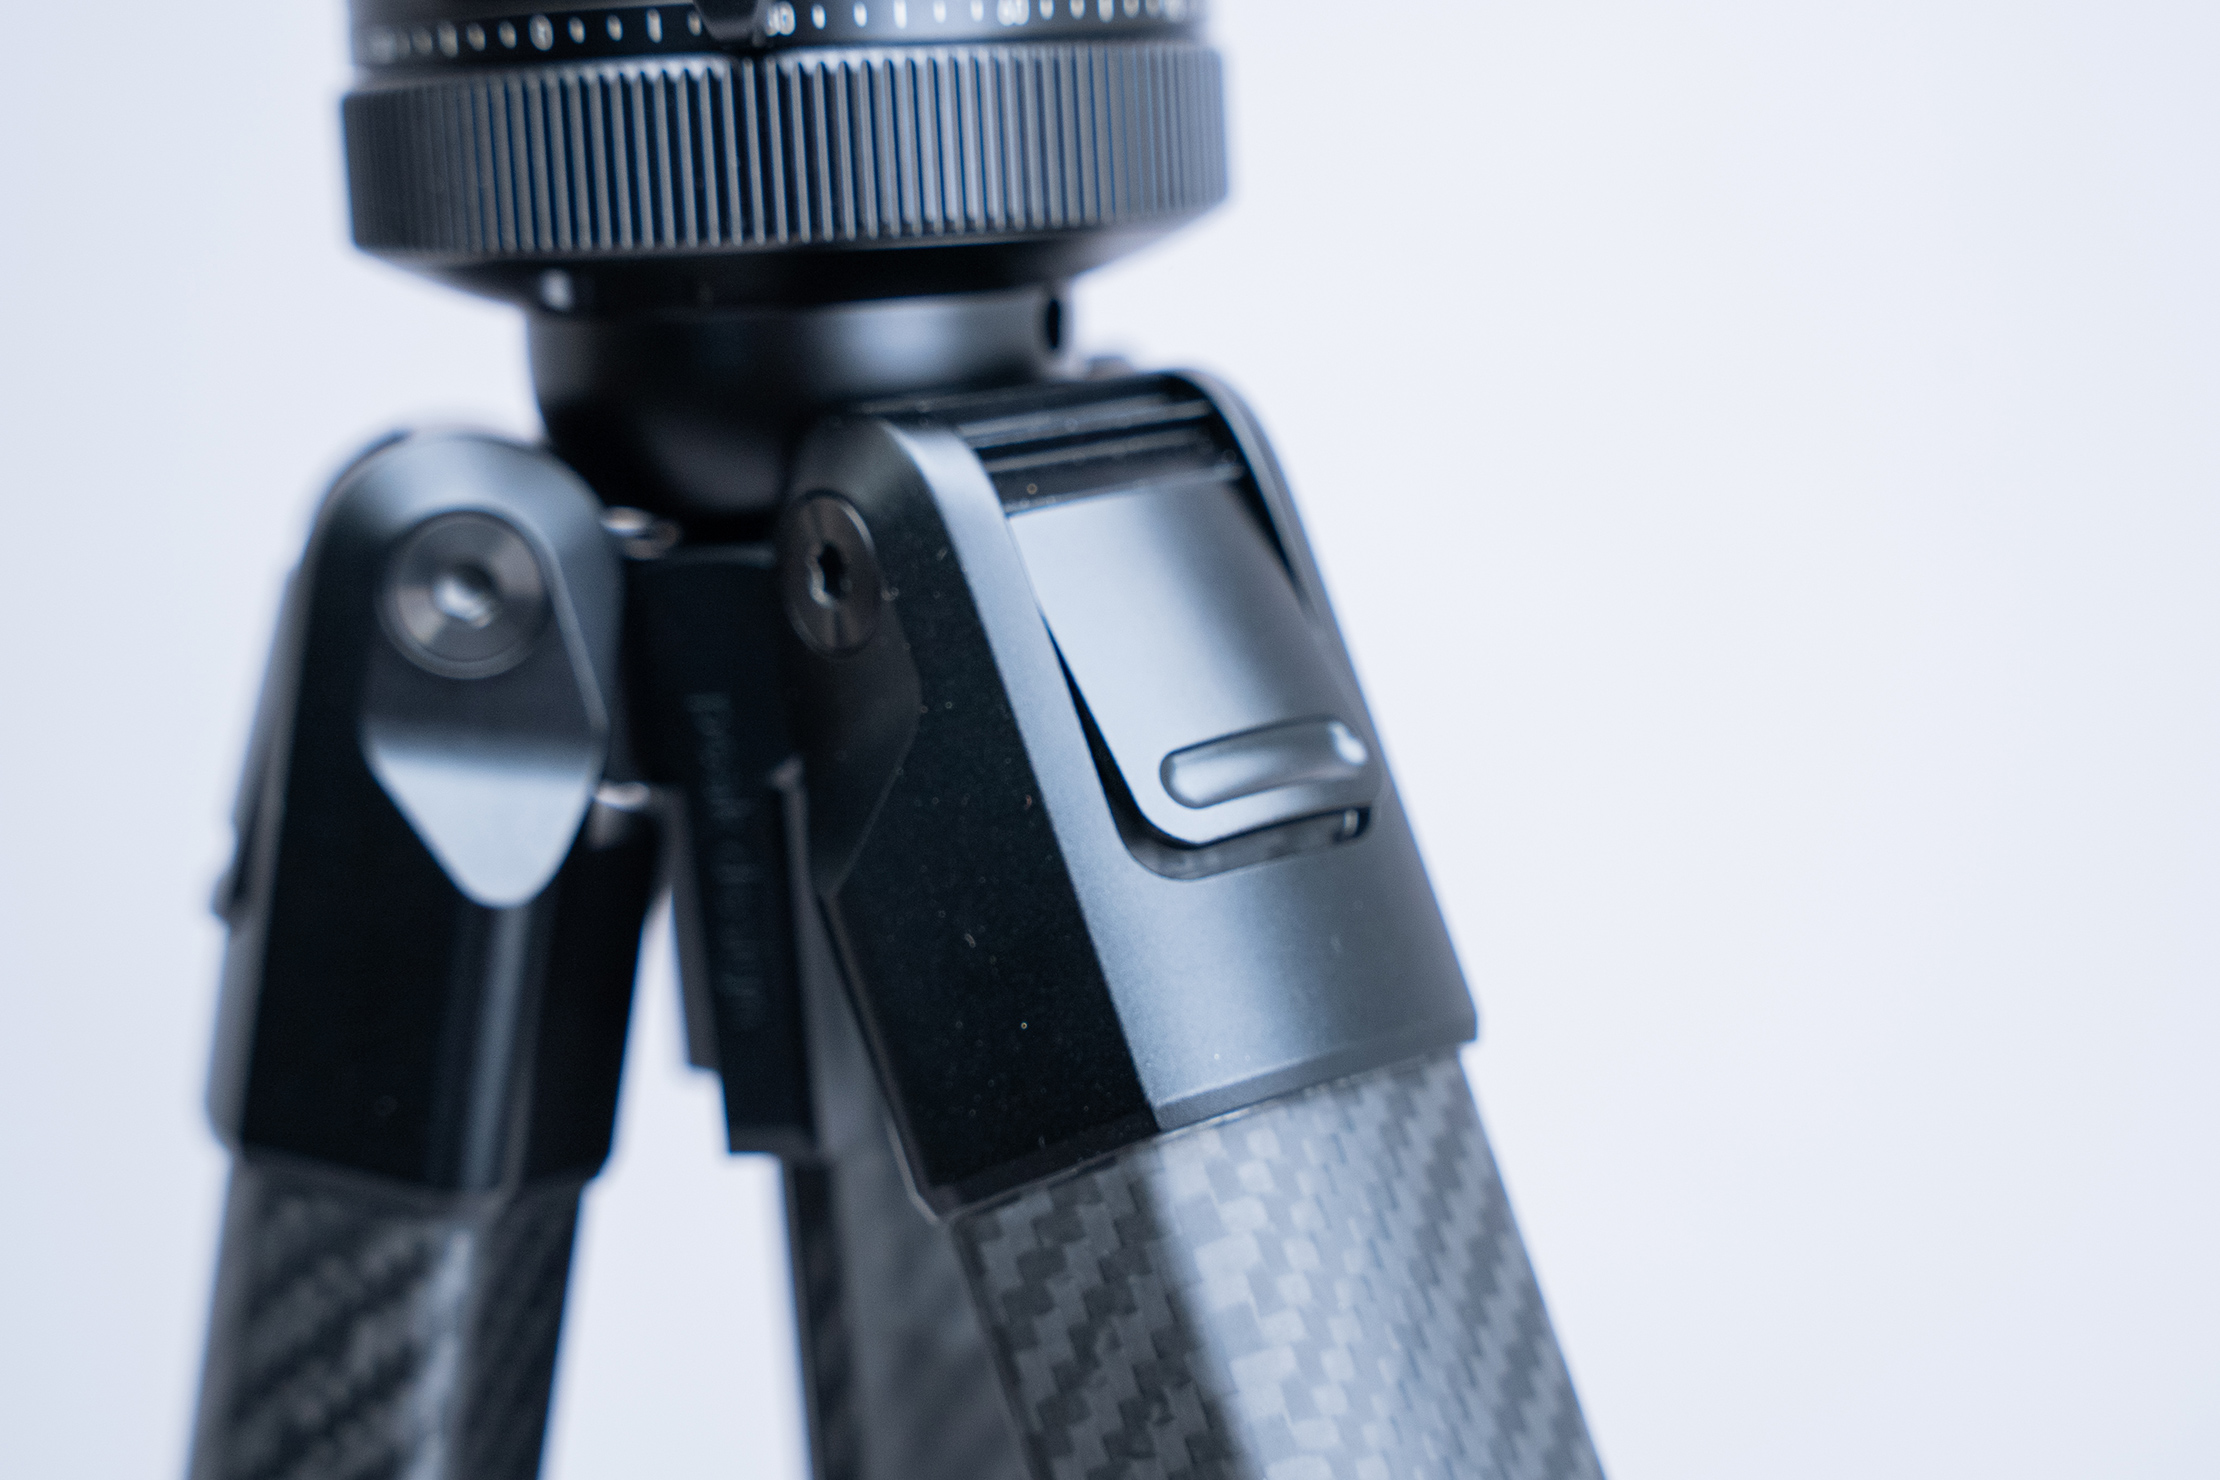
The tripod is crafted from carbon fiber, anodized 6061-T6 recycled aluminum, and stainless steel. The legs and center column are carbon fiber, the ballhead hub is aluminum, and the hardware is stainless steel. This design makes sense for several reasons. The bulk of the tripod is carbon fiber. This is lighter than aluminum and steel, so the tripod is lighter from the outset than if it didn’t use carbon fiber. The carbon fiber is more than durable enough to handle the bumps and knocks of travel, so there’s no strength issue, either. The ballhead is aluminum because the material offers better manipulation than carbon fiber, and it’s stronger in high-stress areas. The hardware is made of stainless steel, which provides higher comprehensive strength than carbon fiber or aluminum; therefore, it makes sense to keep these essential pieces as strong as possible.
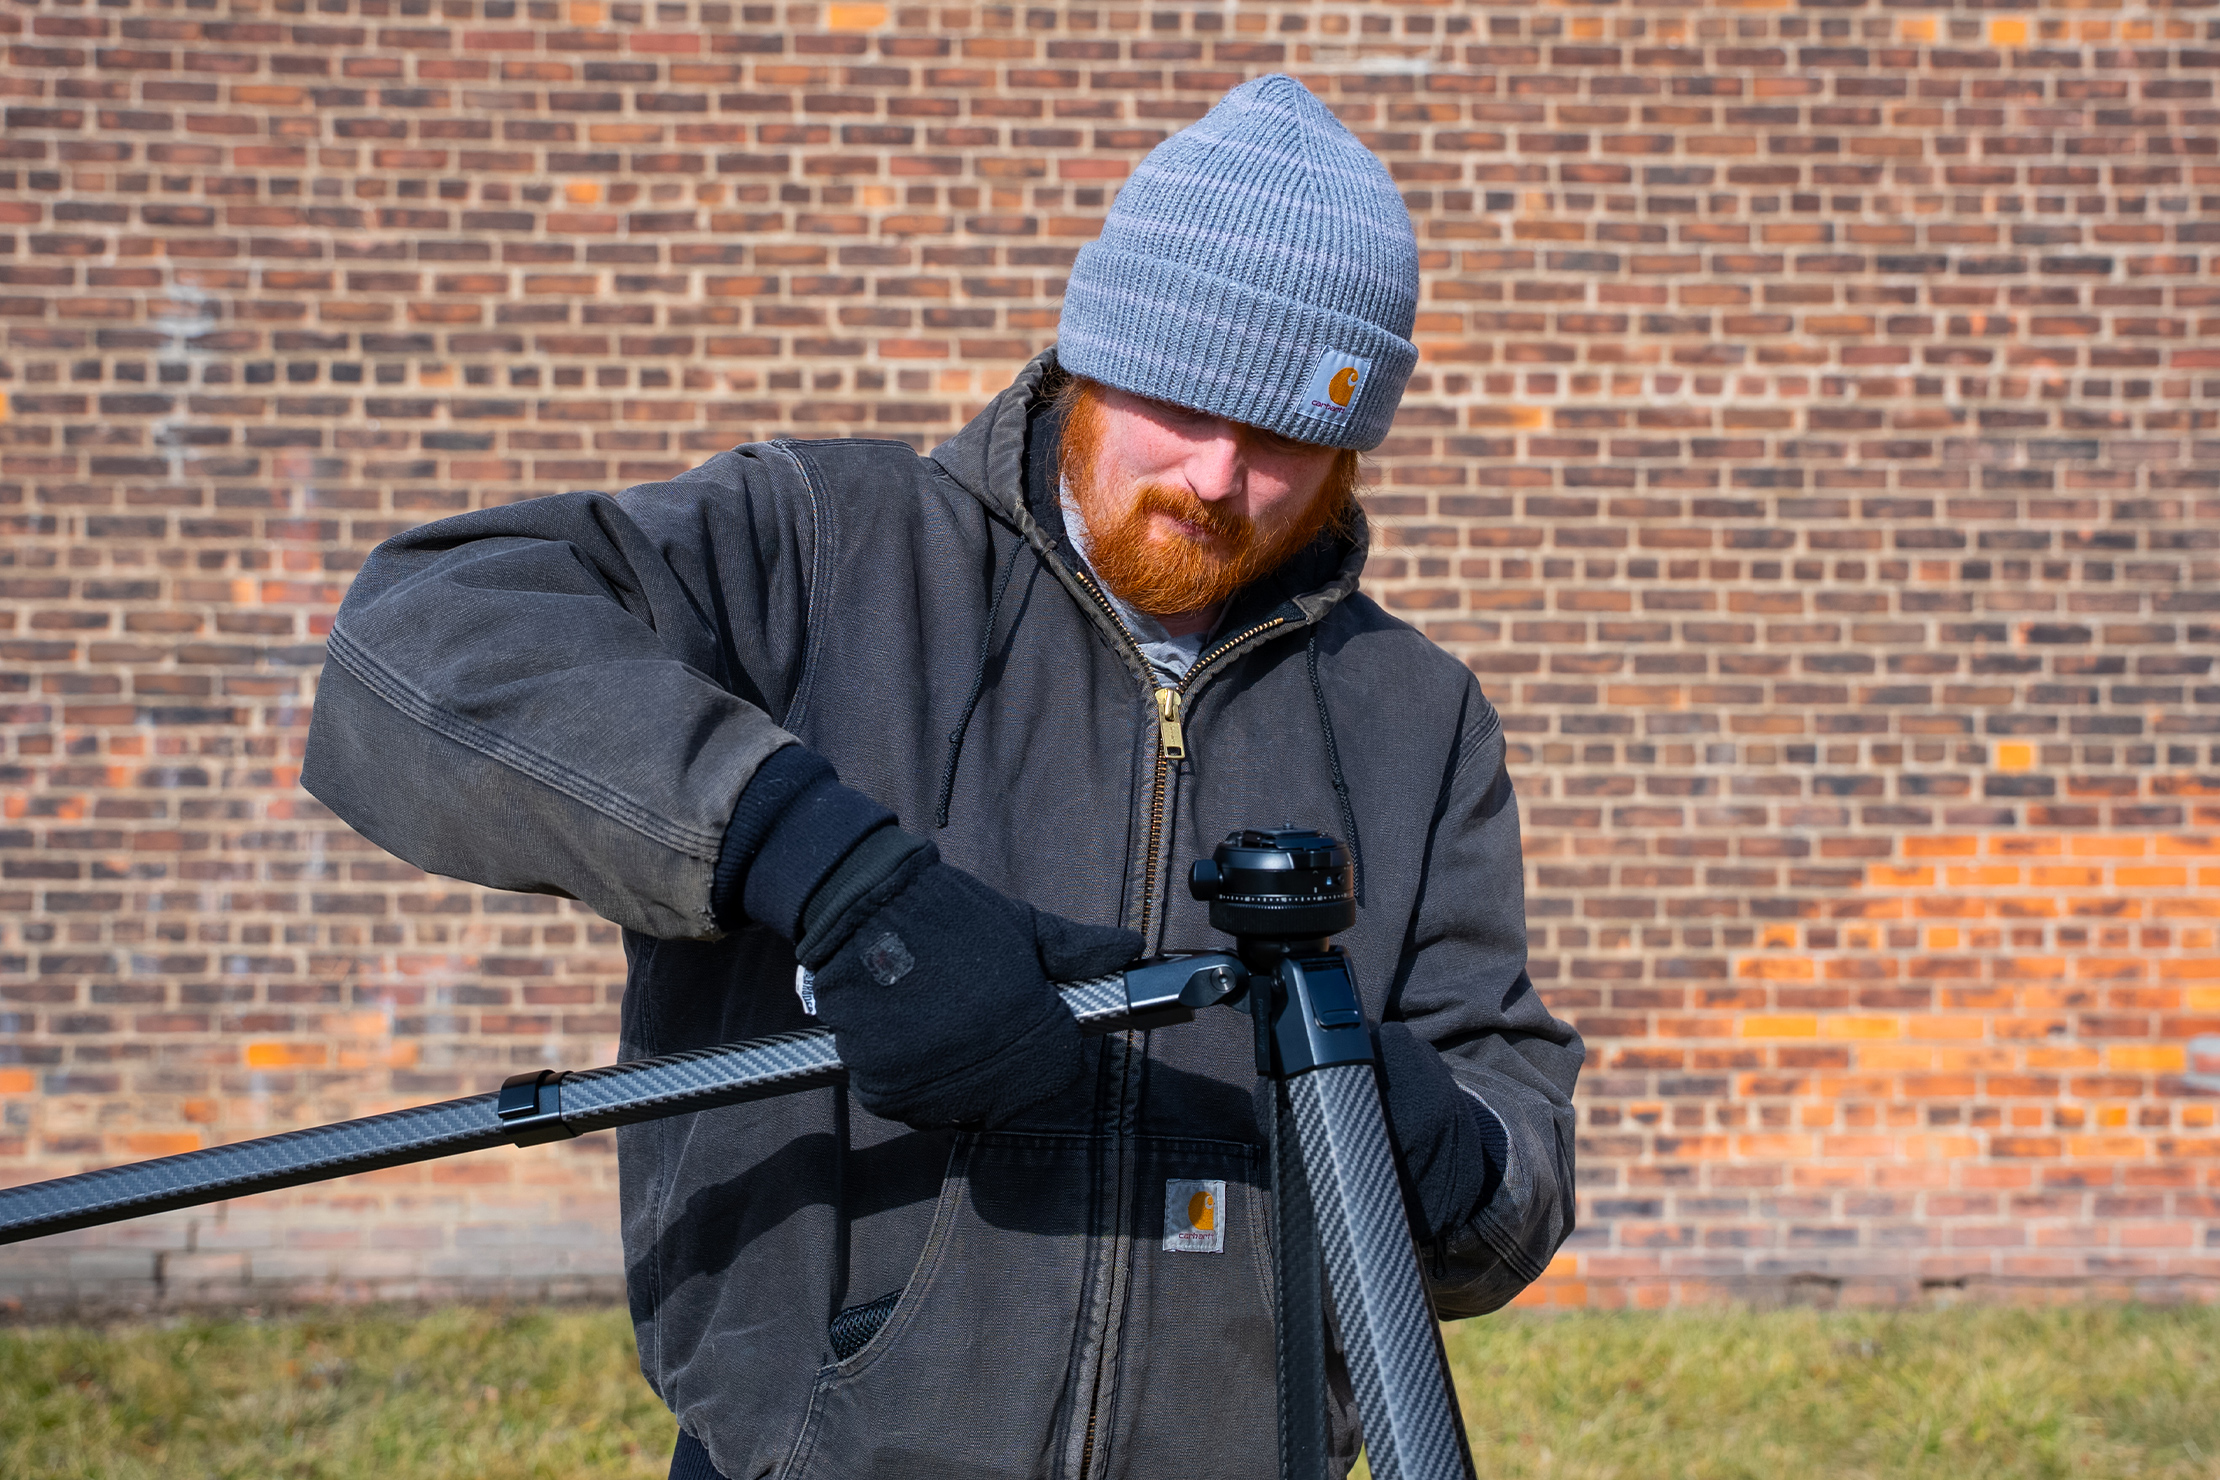
The legs have three clips, so there are four total leg sections. Because they are made of carbon fiber, they are durable yet remain lightweight compared to metal options on the market. We always say that carbon fiber is great until it isn’t, meaning that if it breaks, it’s pretty much done for. In contrast, there is something to be said about the repairability of steel and aluminum. Still, we haven’t had any issues with our carbon fiber tripods from Peak Design (or any brand) breaking, so we’re not too worried about that. Additionally, the parts that hold the carbon fiber on this tripod together are metal, which provides some reassurance for the anxious traveler.
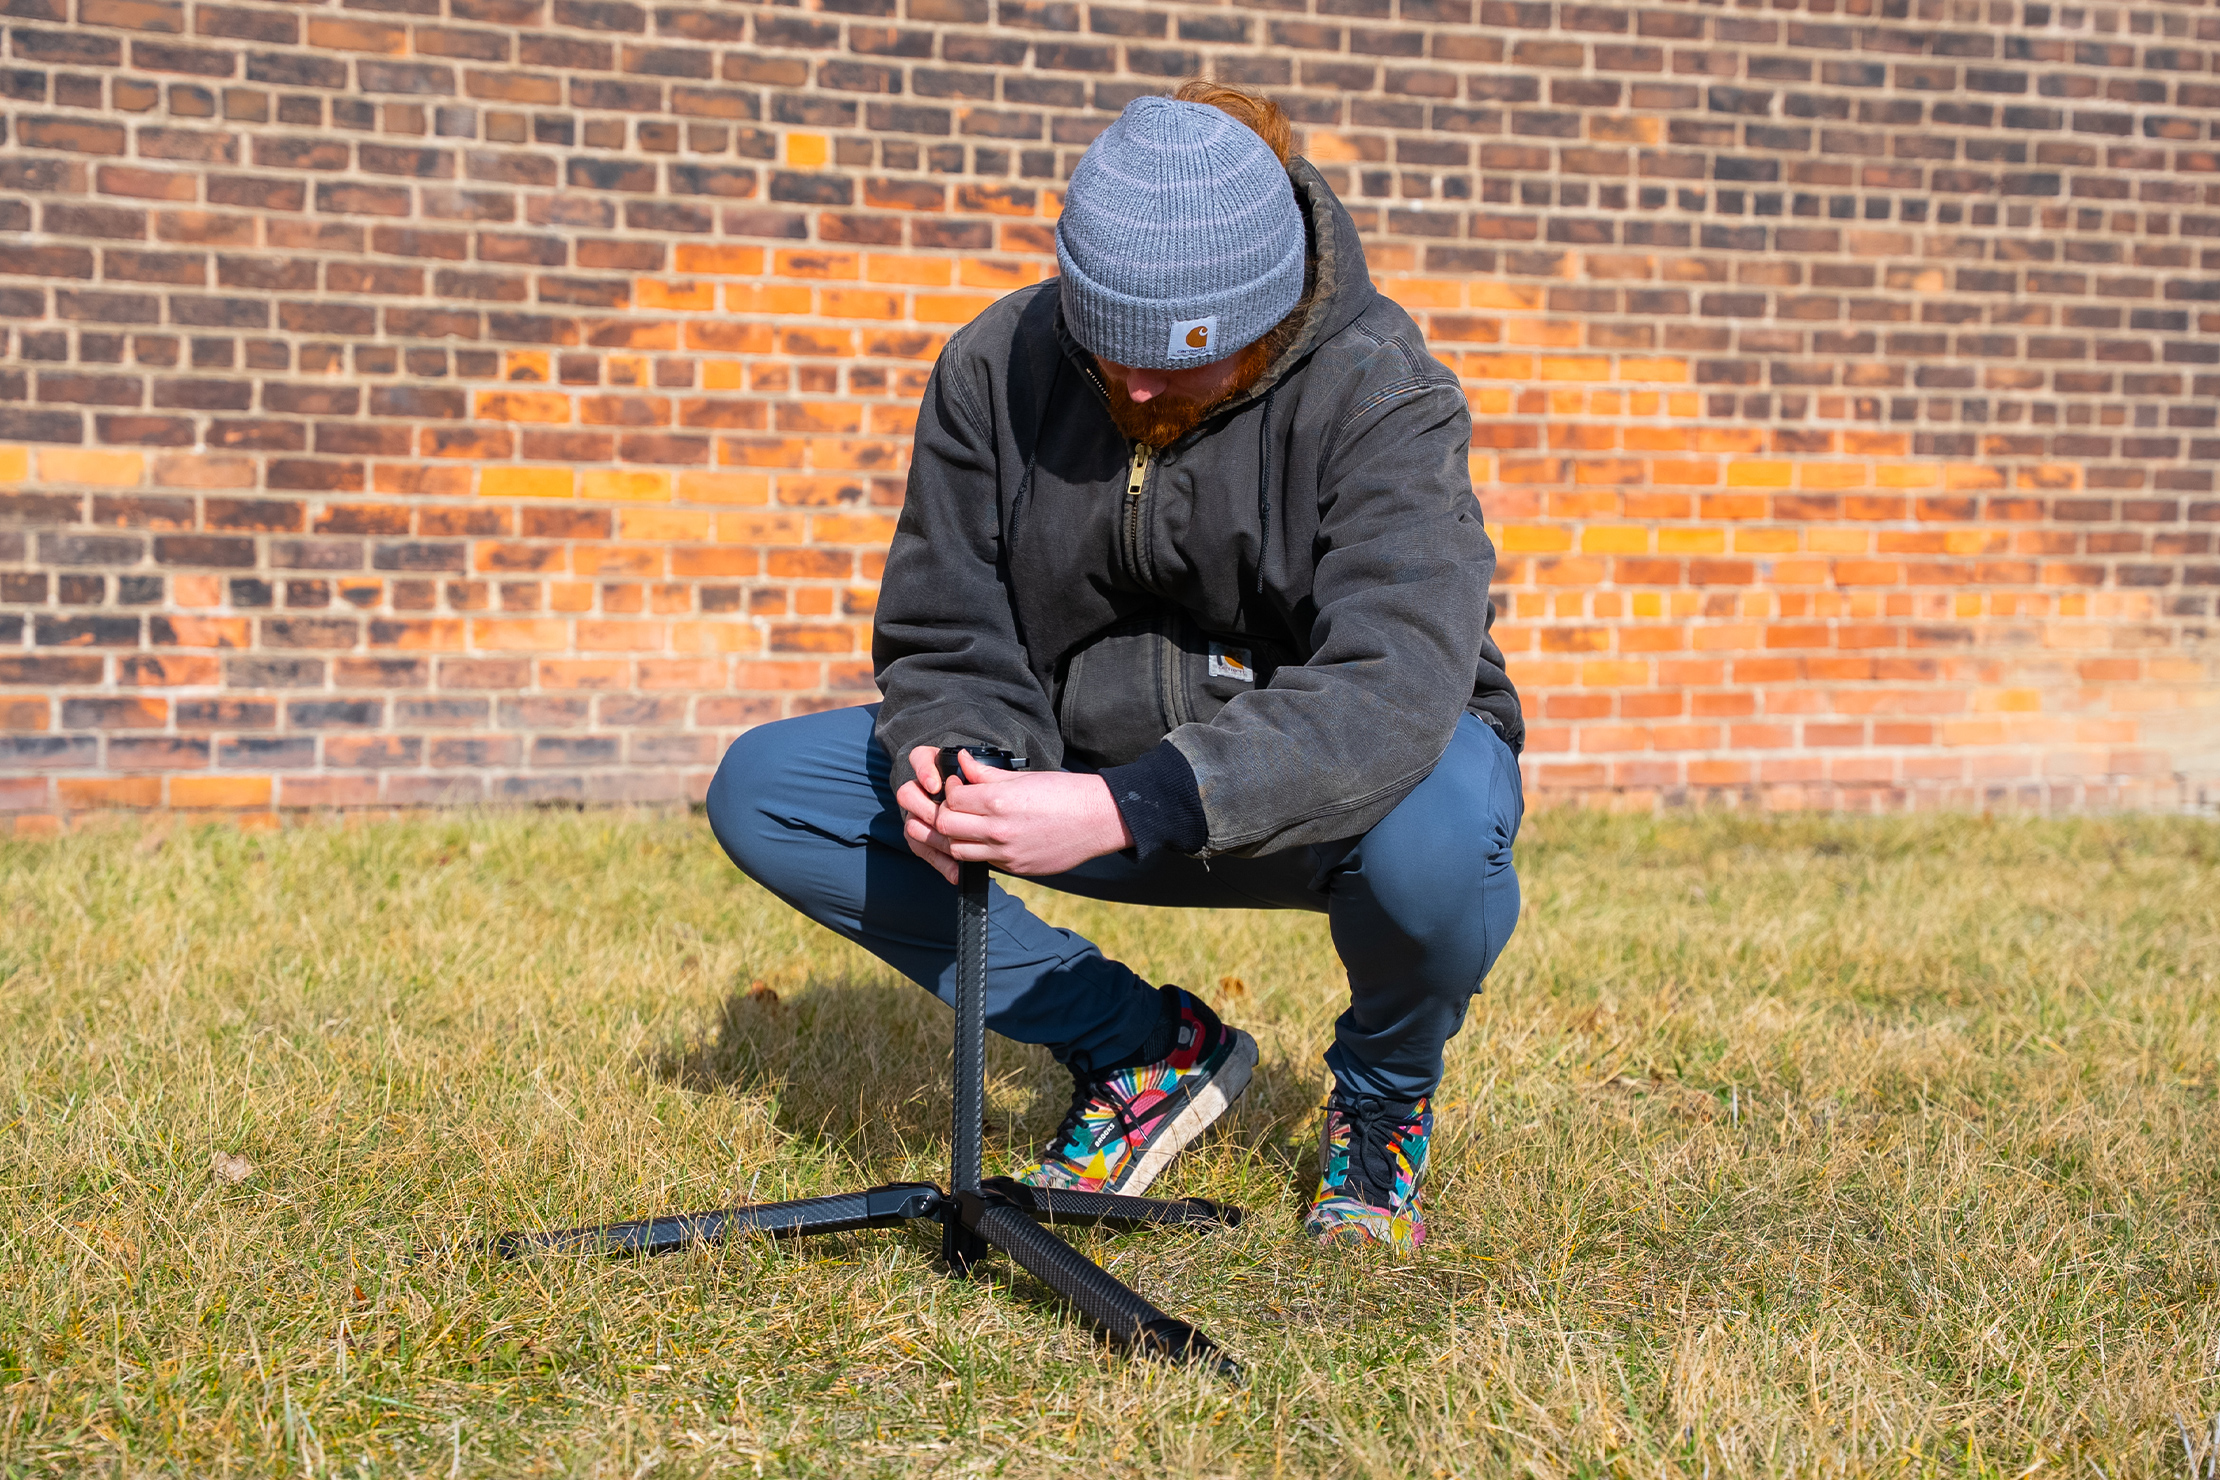
There are three leg angles available, but we kept the tripod in the standard configuration for most of our shooting. That said, the low-angle setting was very helpful on a few occasions when we wanted to get closer to something in the shot, like waving grass or water. All three settings are useful to have, but we didn’t find ourselves using the others as much as we thought we might when we got the tripod. Still, the setting doesn’t get in the way if you aren’t using it, so we can’t dismiss it too much.
The center column rises, too, so you get some extra height from that. It comes with an included hook on the bottom side, allowing you to add weight and make the tripod more stable, which we appreciate. This is particularly helpful if it’s windy, as it lowers the center of gravity for the tripod. It’s also handy if it is raining and you don’t want to set your camera bag on the ground! The center column is also made of carbon fiber, which saves weight compared to a metal alternative.
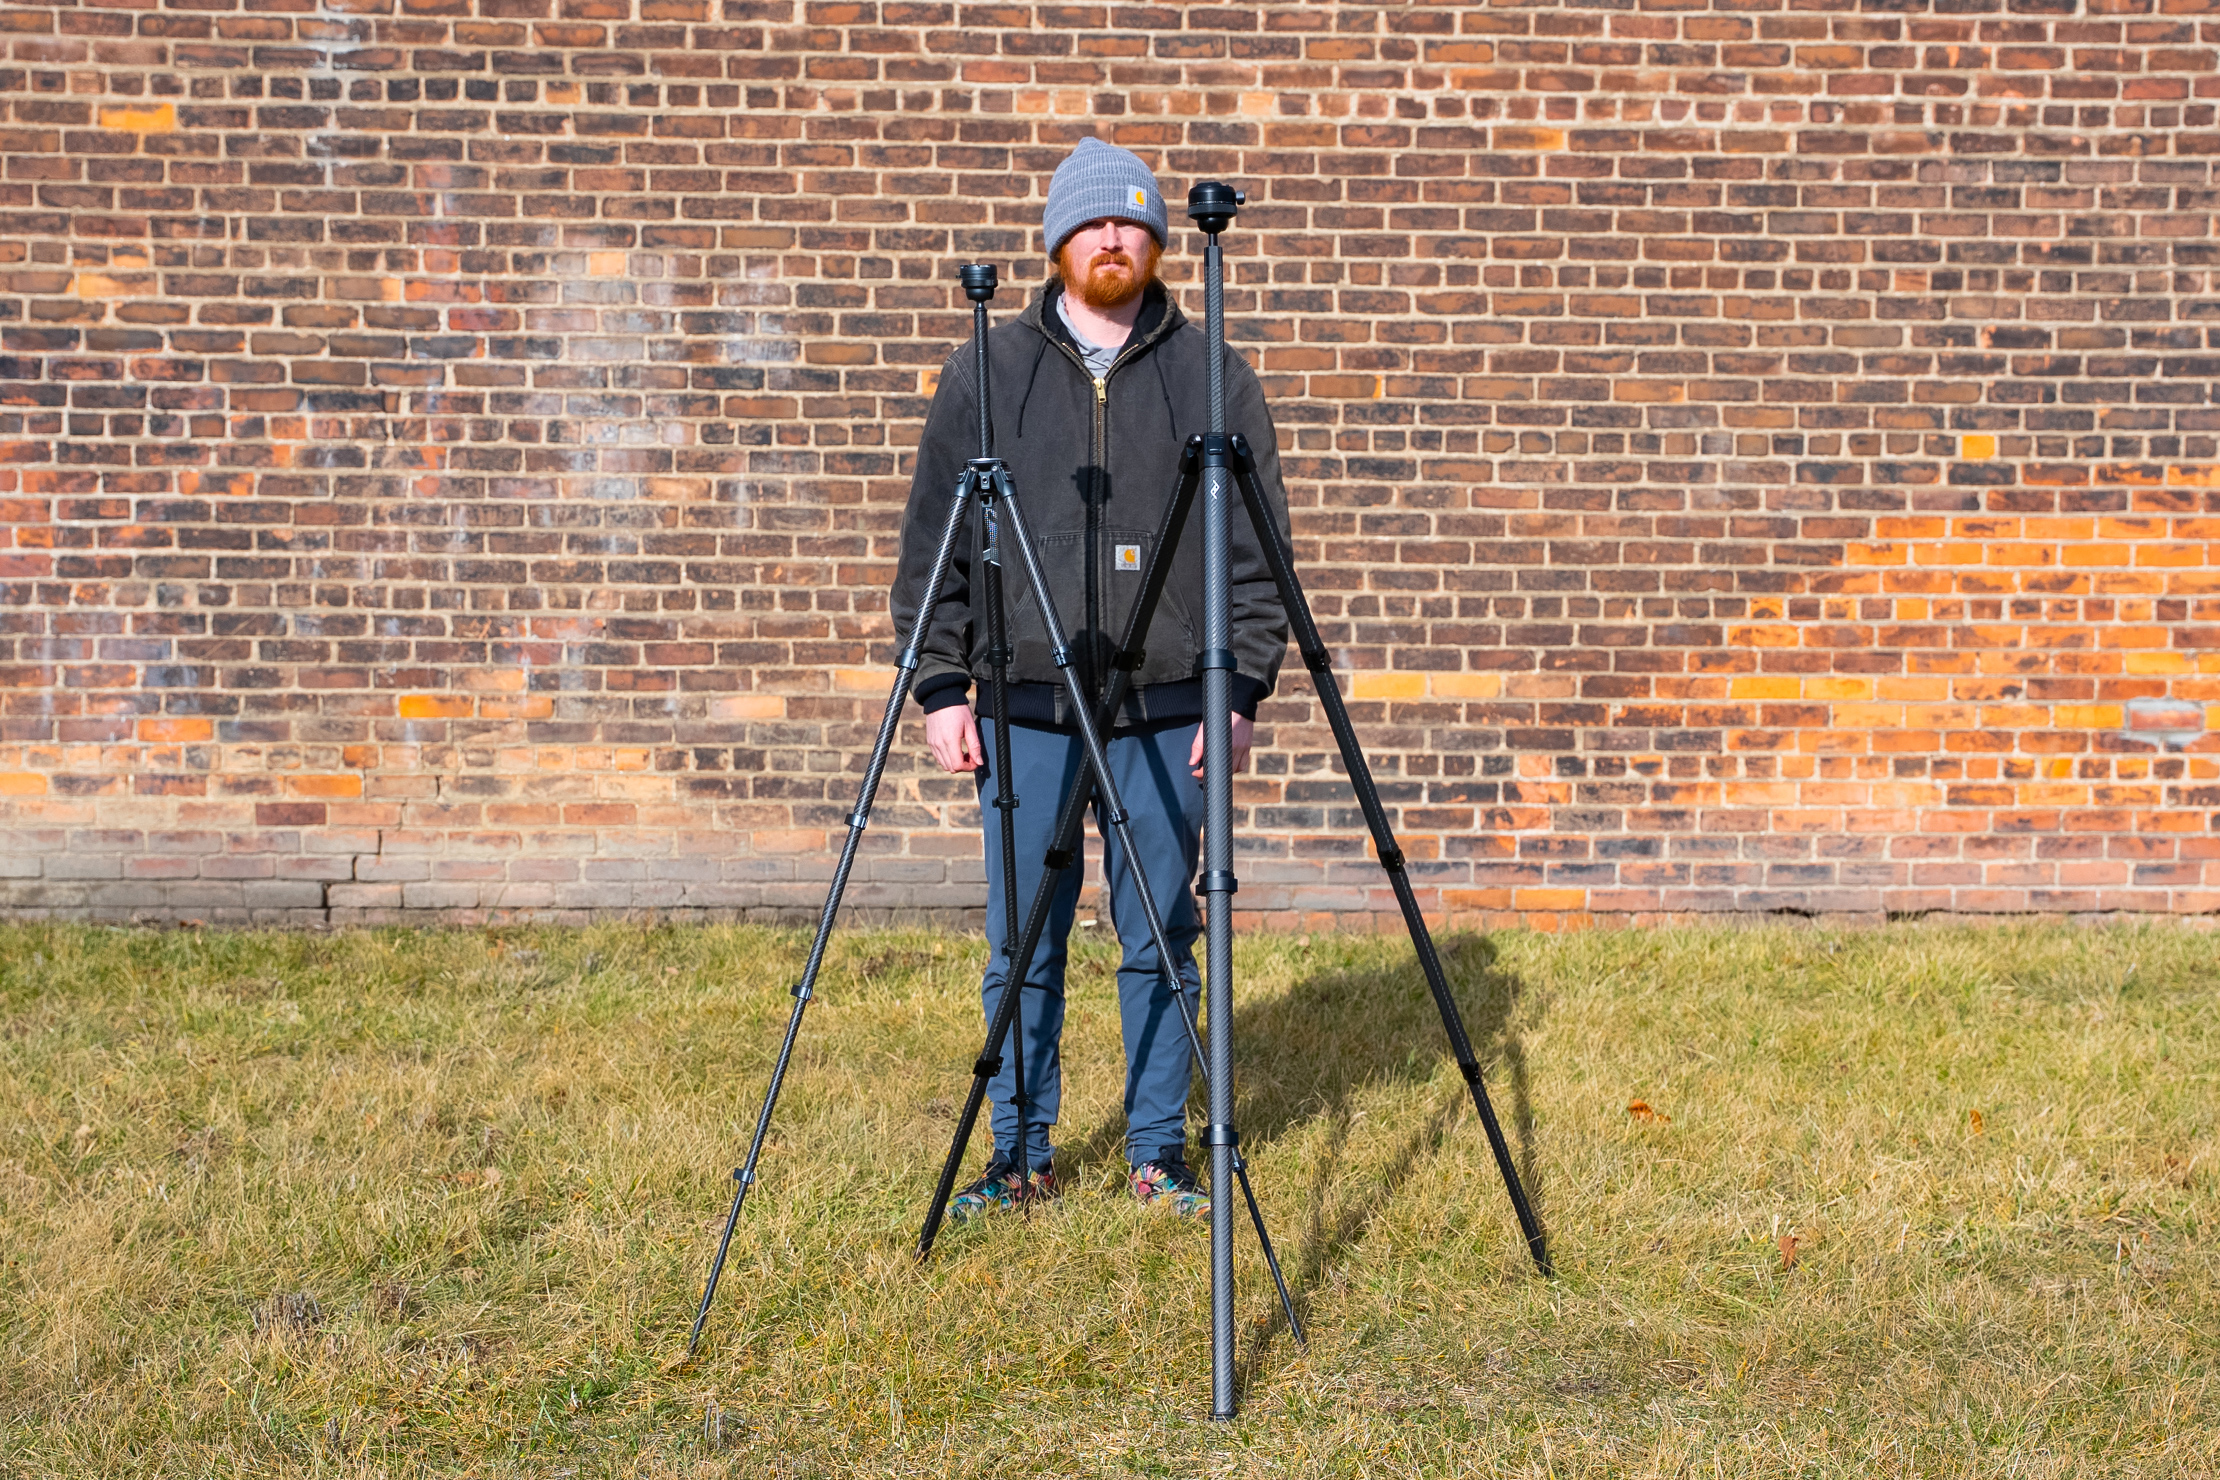
With the tripod fully extended, without the center column, it reaches a maximum height of 138 centimeters (54.3 inches). With the center column engaged, it reaches a maximum of 168.4 centimeters (66.3 inches). The lowest the tripod can reach on level ground is 15.9 centimeters (6.3 inches). The Tall version of the tripod reaches a maximum height of 197.4 centimeters (77.7 inches), with a slightly higher minimum height of 17.3 centimeters (6.8 inches). In contrast, the Lite version is somewhat smaller, with a maximum height of 162.4 centimeters (64 inches) and a minimum height of 15.8 centimeters (6.2 inches). That’s a lot of numbers, so we’ll make it easier by throwing more numbers at you. The standard Pro Tripod’s 66.3-inch height is close to five and a half feet tall. The Tall model is 117% taller, and the Lite model is 96% the size of the standard model.
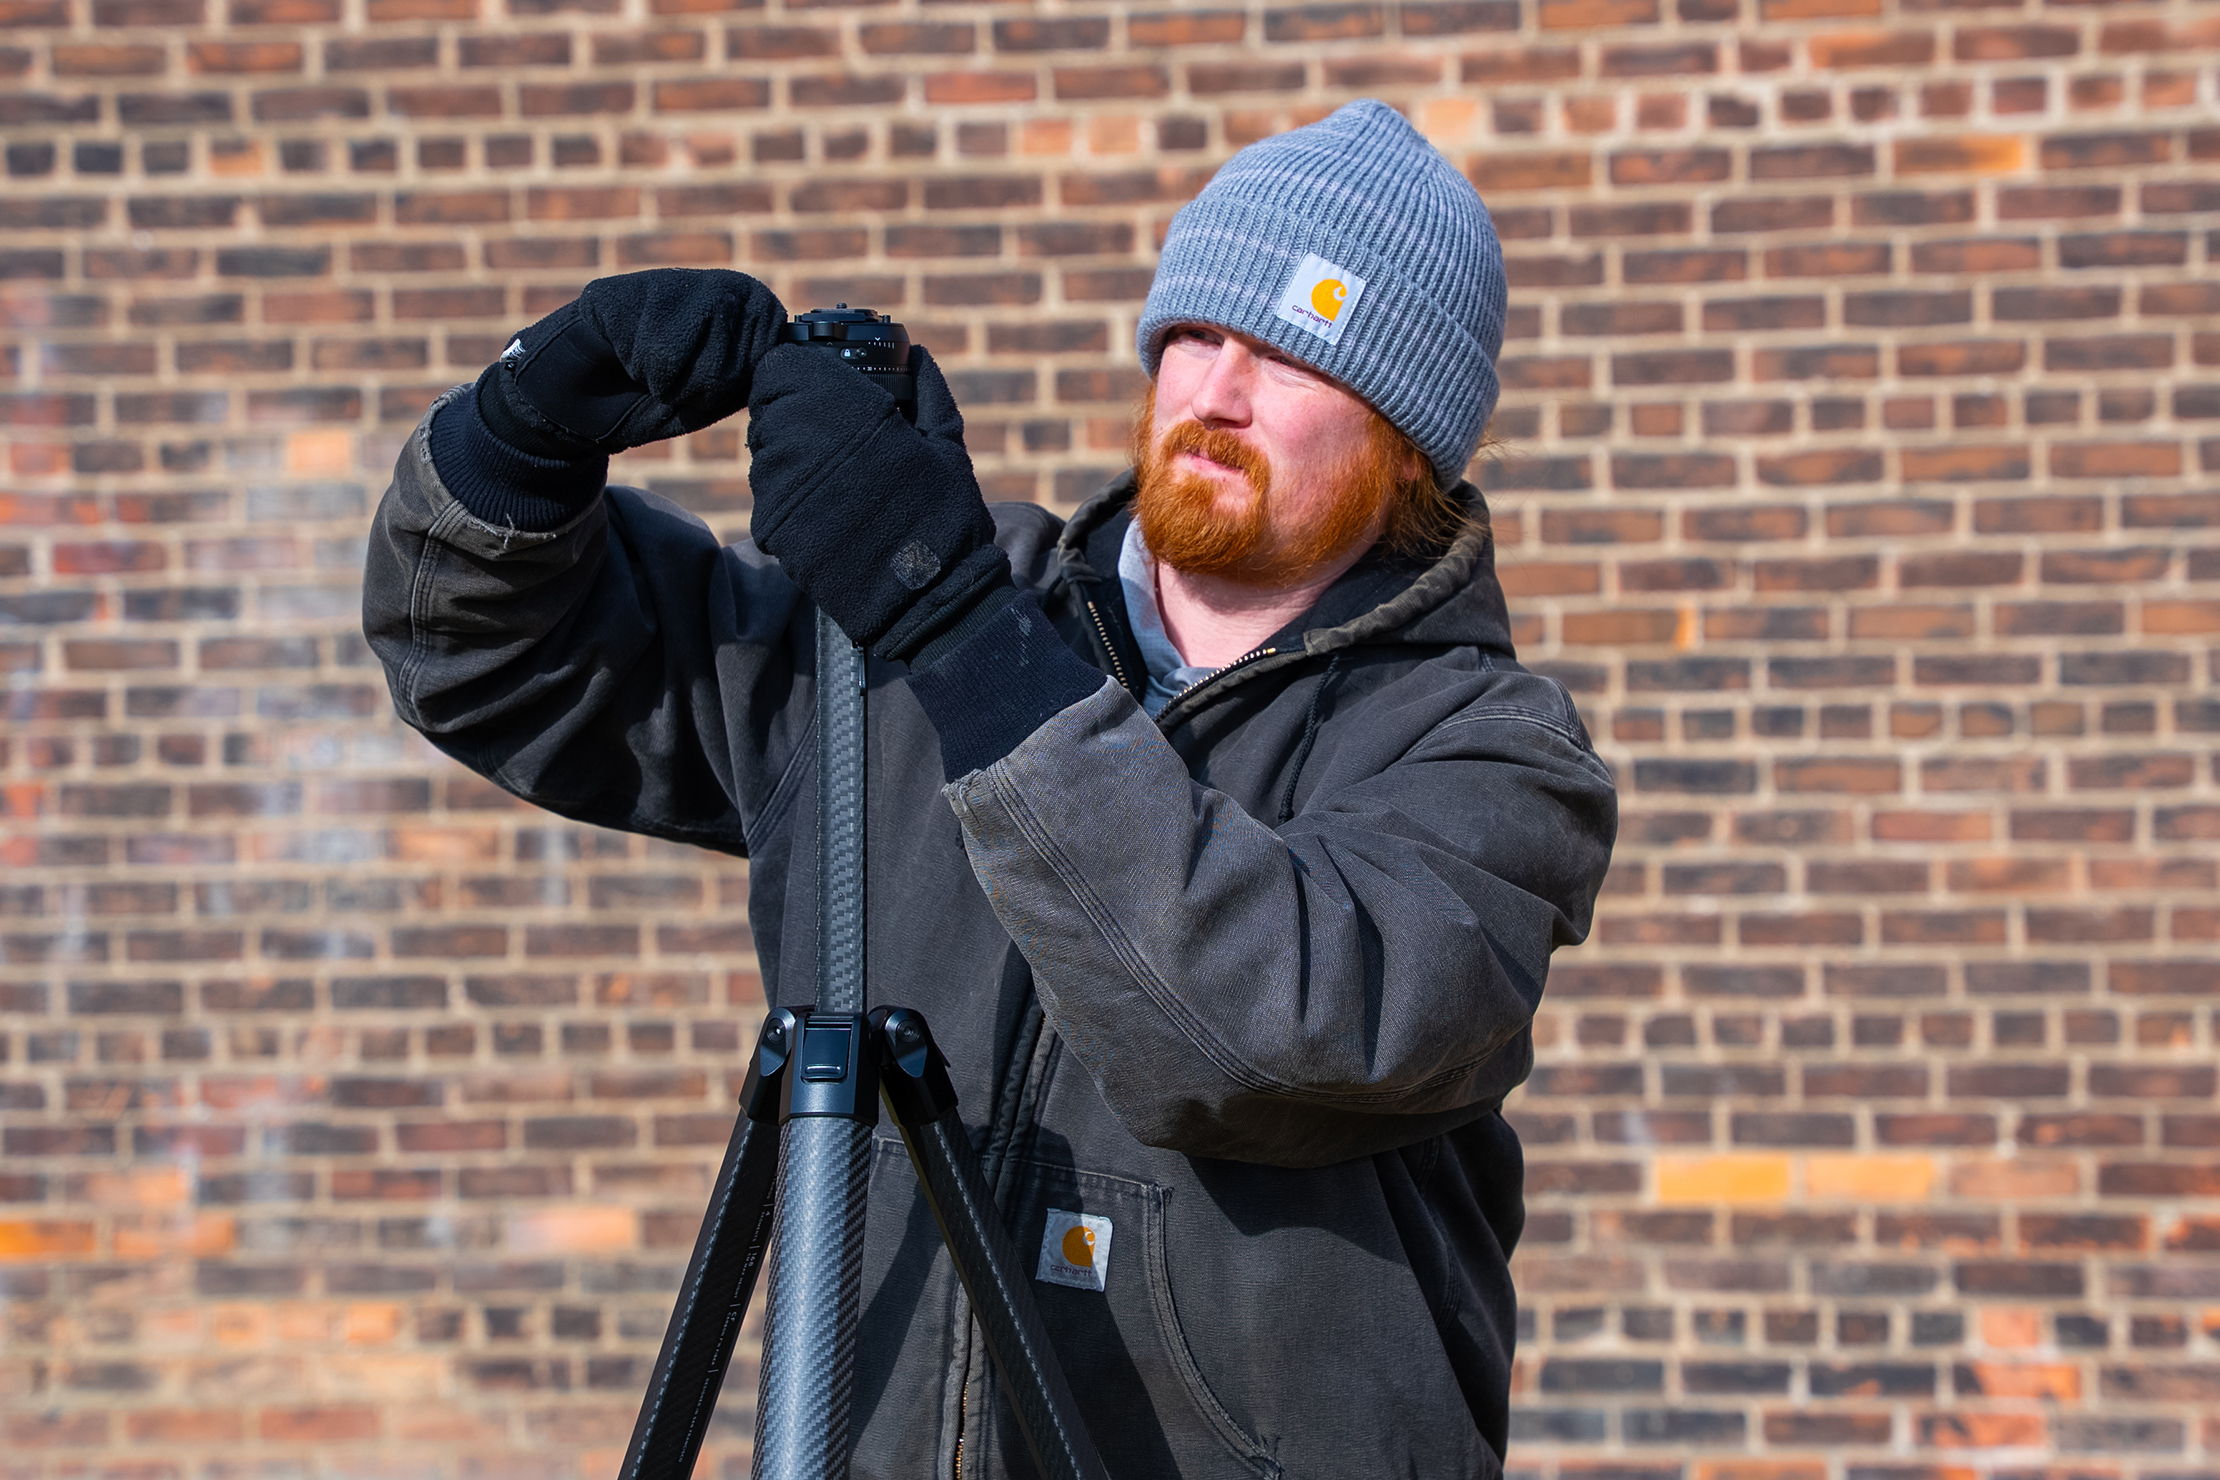
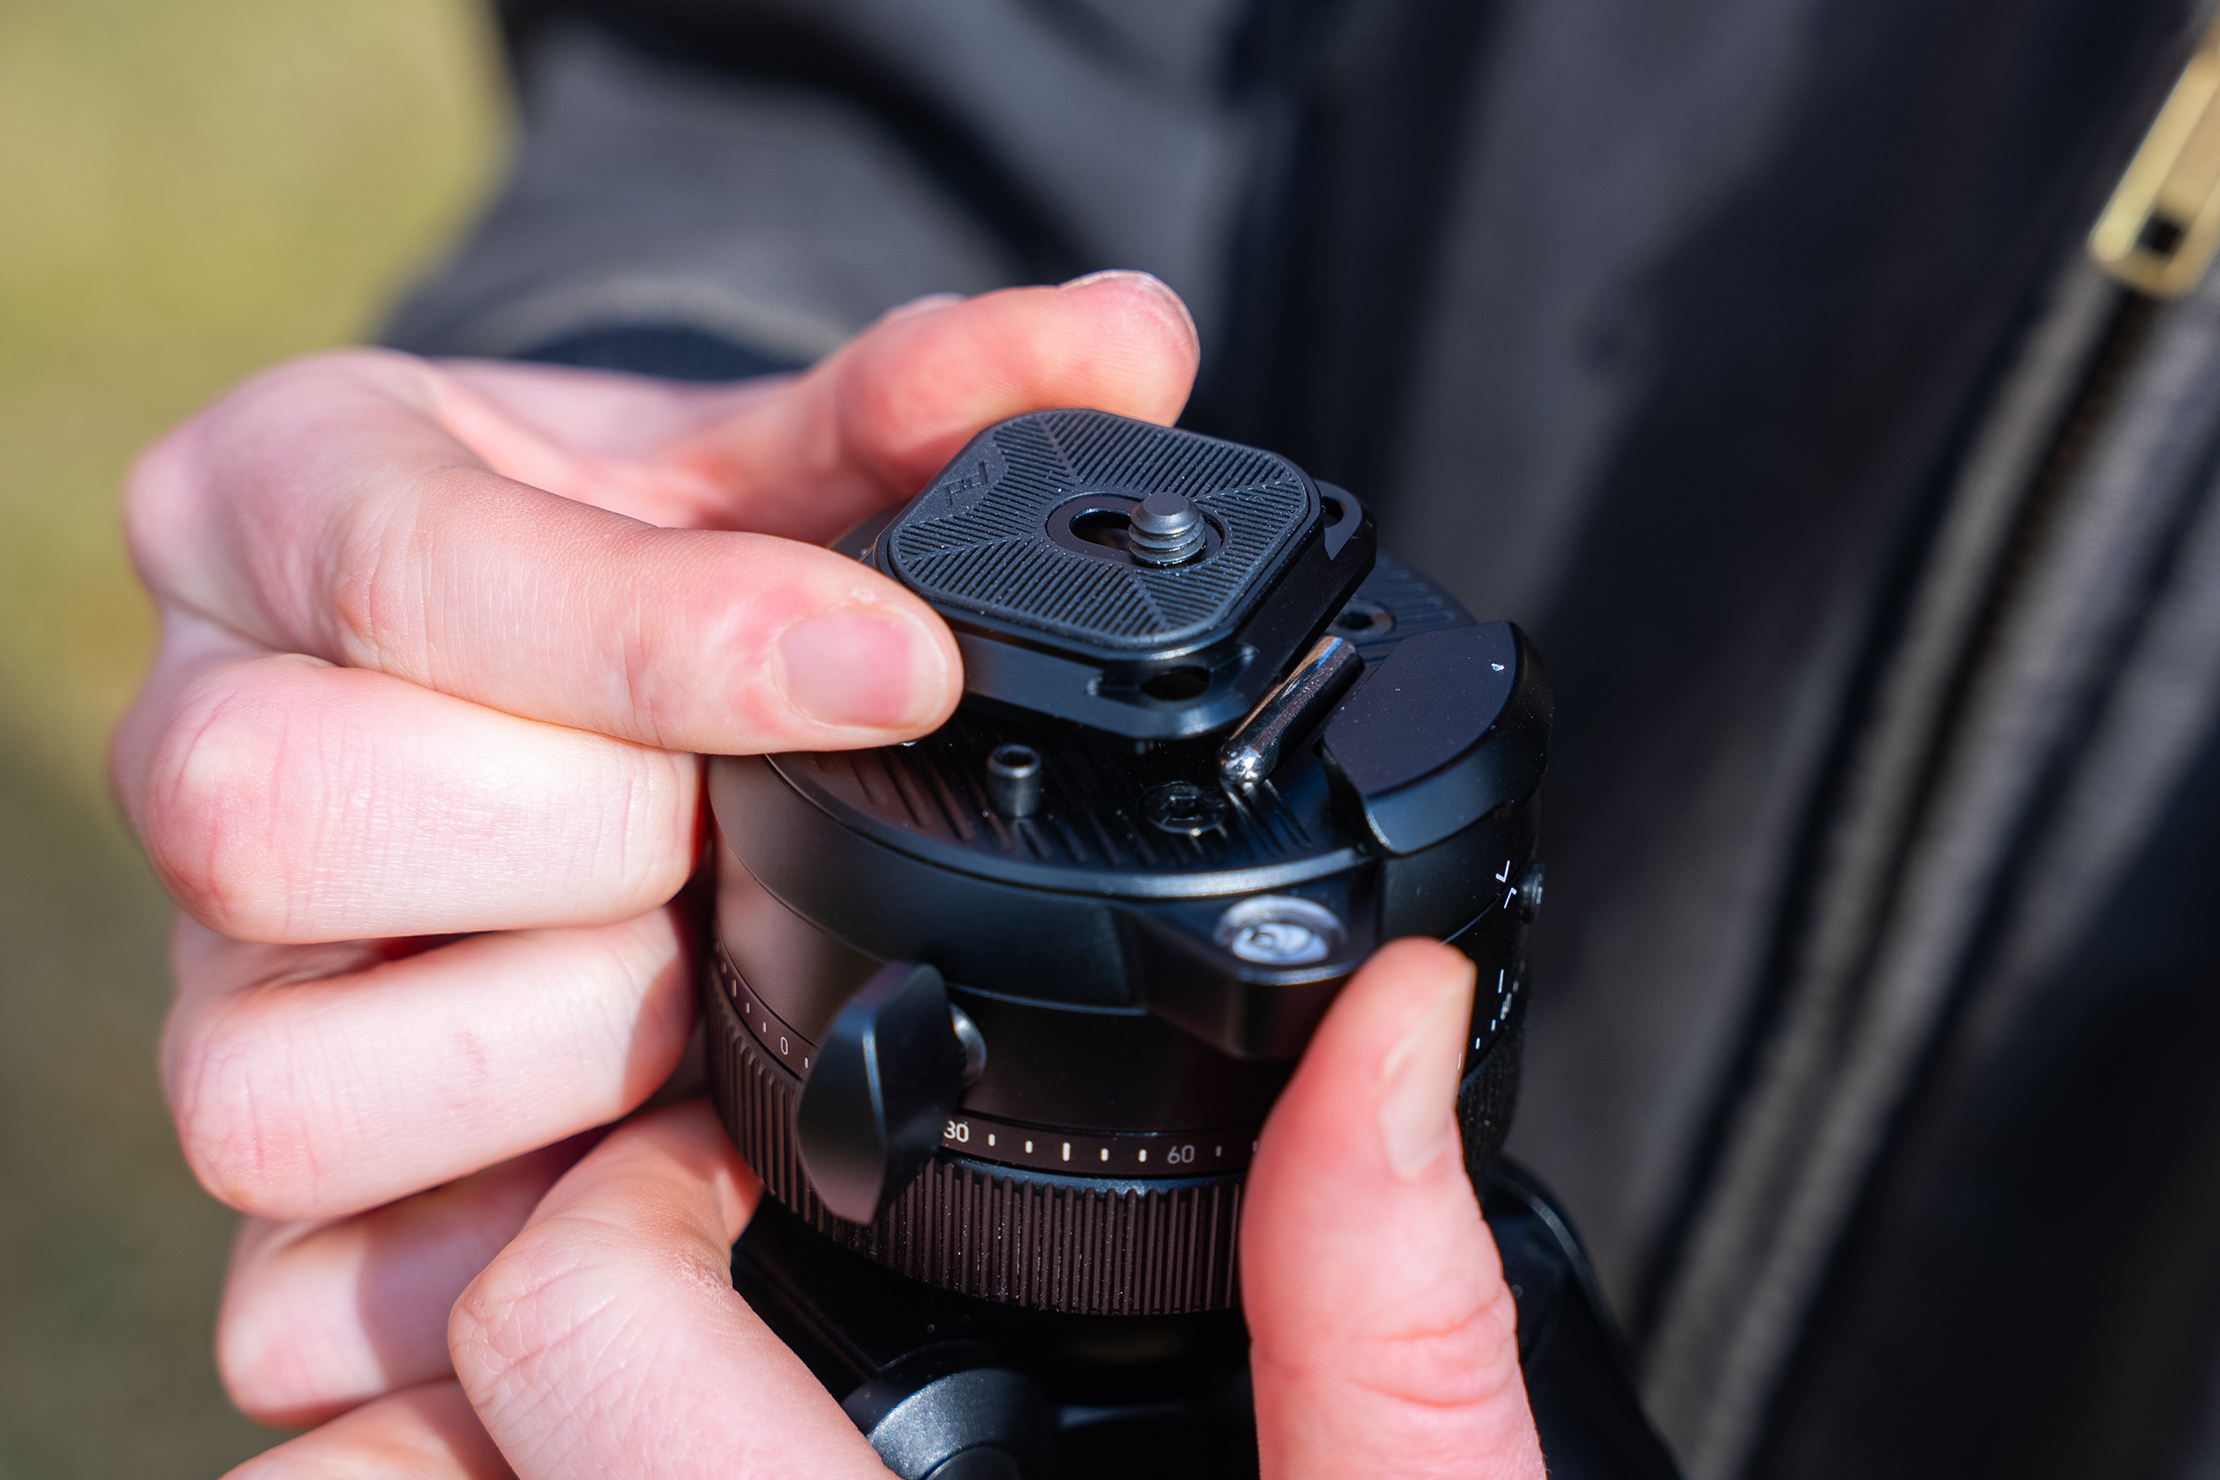
The tripod’s head is compact, but useful. It features a single adjustment ring, which allows for most of its usability. The ring is easy to adjust with one hand while keeping your other hand on your camera. You loosen the right to change the angle, and tighten it up once you’ve got it where you want. It has less wiggle after you’ve tightened it than any other tripod head that we’ve ever used, and our staff writer has been through dozens in his career as a hobbyist photographer. This design is easy to get accustomed to and use right out of the box.
There’s a simple knob to loosen or tighten fluid panning, which is very smooth, especially if you get a handle attachment. This makes lining up a photo simple and getting smooth panning shots for video quick and easy.
The camera plate is small enough to be worn on your body at all times but strong enough to hold it in place, even when carrying the tripod across rugged terrain. It’s easy to adjust and attach, too, without worrying that it’ll pop off when you don’t want it to.
There are other accessories to work with, too. We’ve tried the Spike Feet on icy Michigan roads and the Pro Leveling Base for use around Detroit. Both were easy to equip and use. The Tilt Mod Ball Head looks excellent for video, though we haven’t put it to the test yet.
The max capacity of the tripod is a whopping 40 pounds (18.1 kilograms), which is wild by most standards. For example, two of the most popular mirrorless cameras of the day are the Canon EOS R6 Mark III and the Sony a7 V. Both of these cameras weigh in at 1.5 pounds (without a lens), meaning you can add a ton of extras to your body without worrying about bogging down this tripod. Or, if you have a more professional rig, you don’t have to worry about the tripod being able to handle your personal camera, the one you use for work, and the one that you travel with. Let’s be honest, we know you have three. Even the larger cameras of yesteryear, such as Pentax’s 6×7 medium-format film camera, can be used with the Pro Tripod without worry, as it weighs only 5.1 pounds (our staff writer has one, and we’ve tried it). We found that smaller cameras handle better due to their smaller head, but we were able to use everything from a GoPro to the Pentax 6×7 here without much fuss.
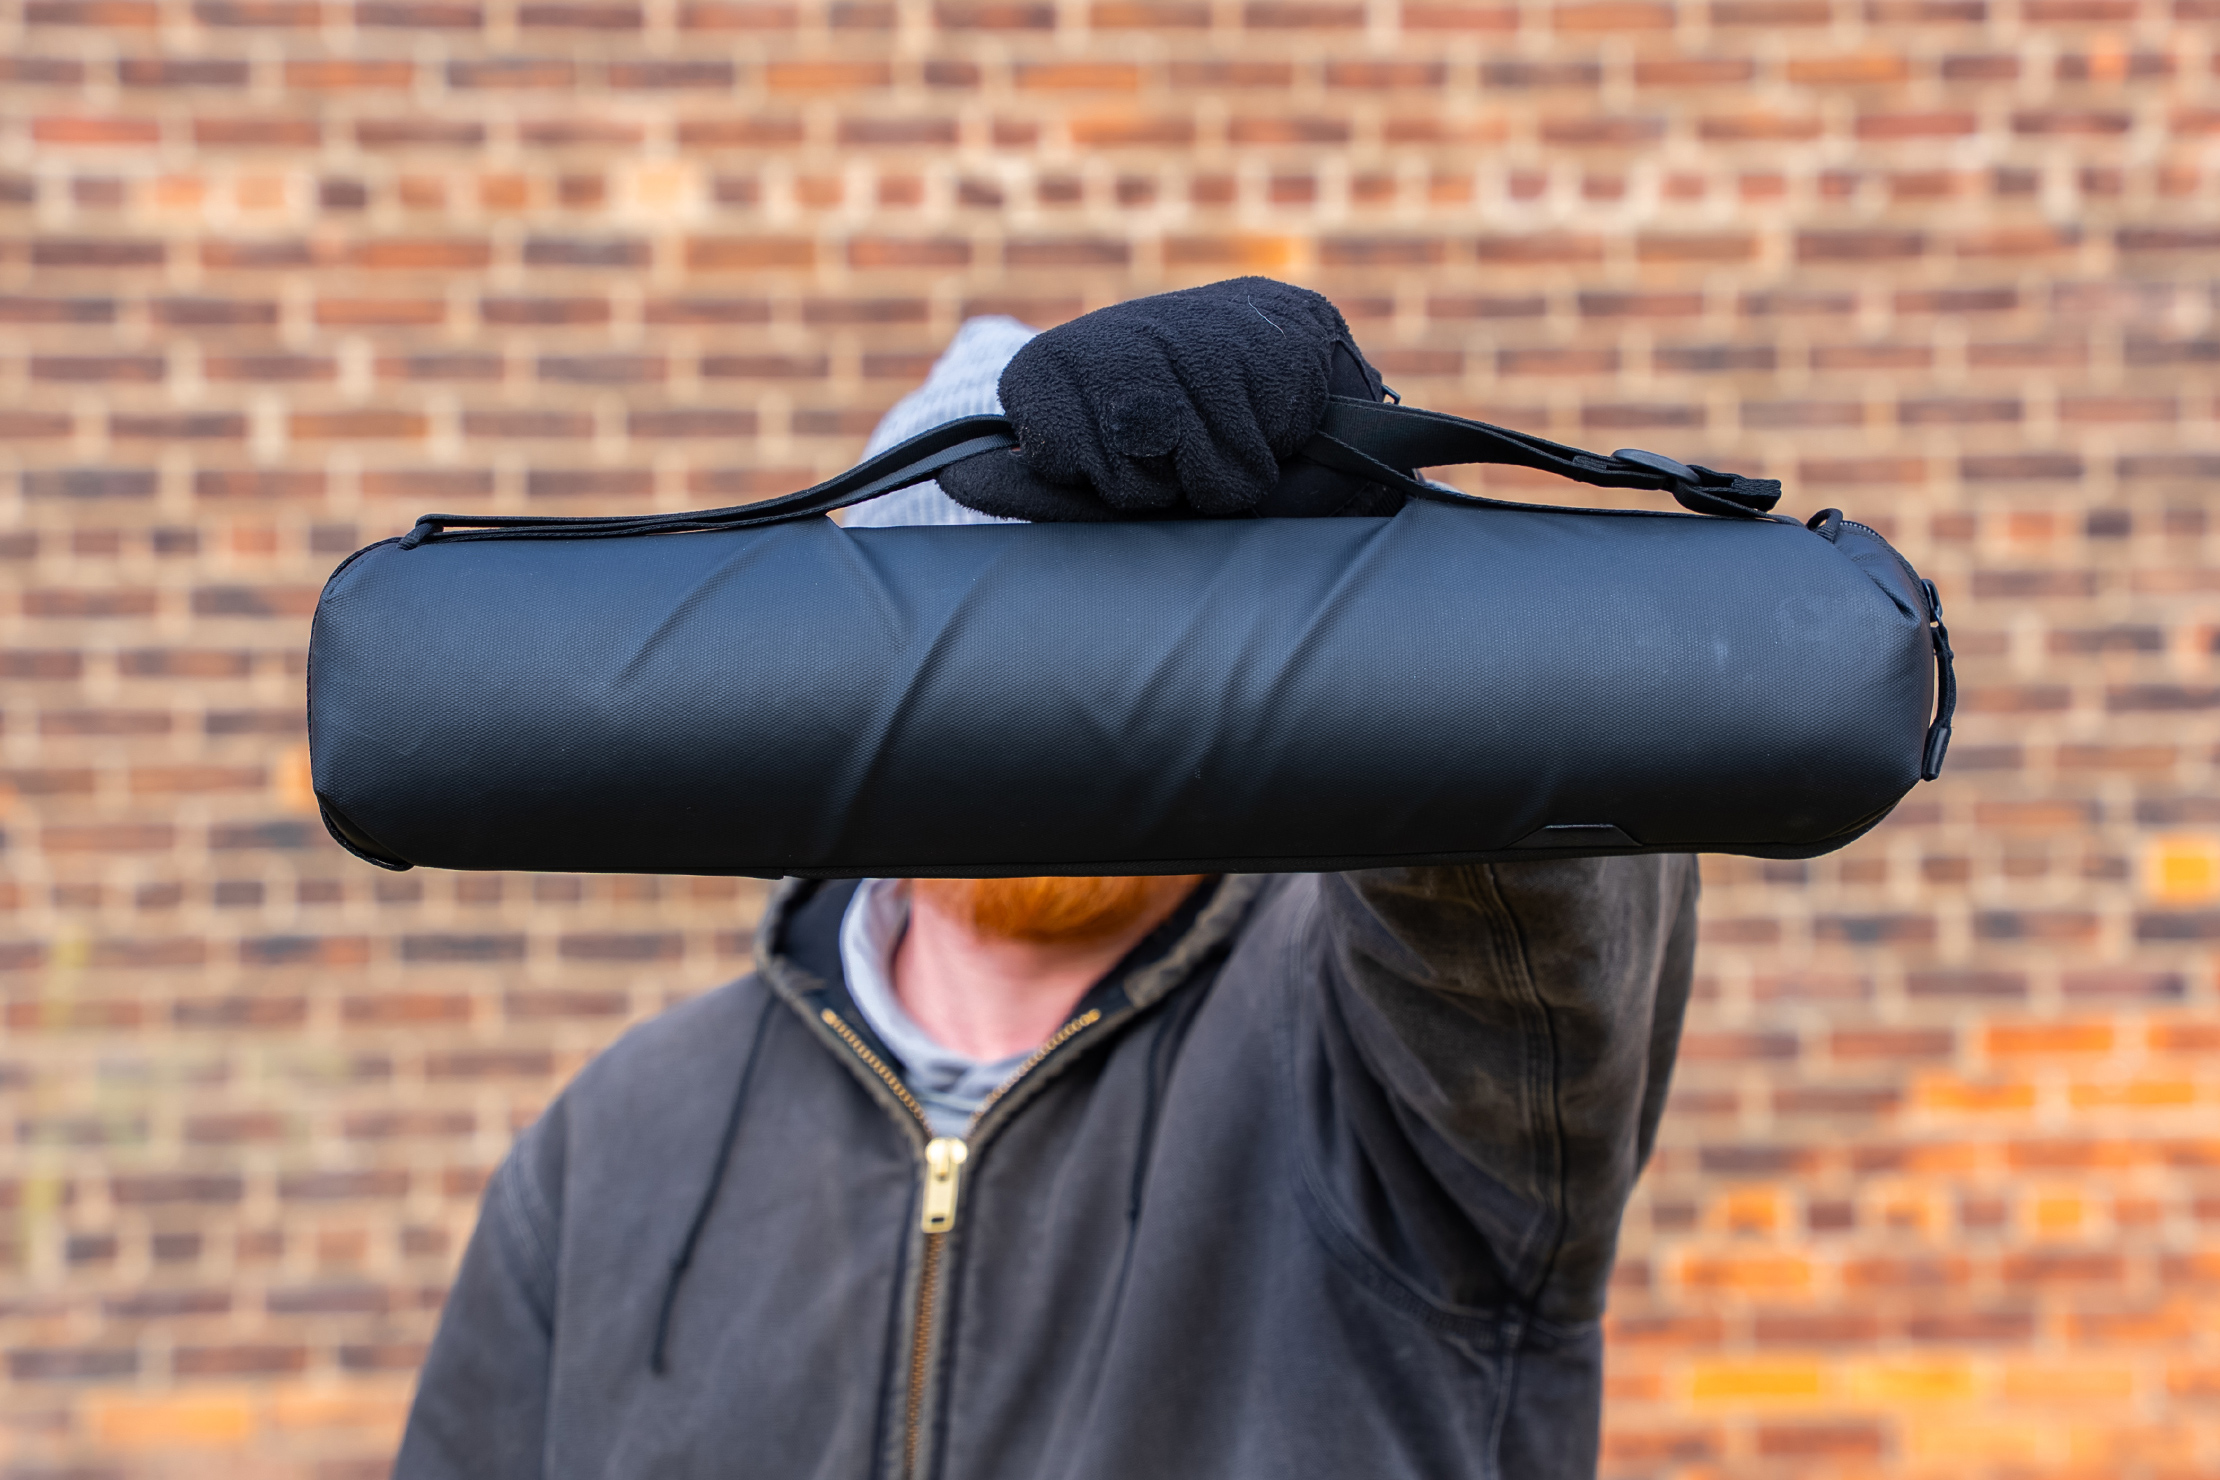
The tripod comes with a carrying case, too, which we appreciate, but didn’t use often in the field. Typically, we used the case for storage at home. If we were out shooting, we just took it naked, and the carbon fiber, aluminum, and stainless steel handled just fine.
Packability
The Pro Tripod weighs 1.9 kilograms (4.2 pounds) and measures 50.1 centimeters (19.7 inches) in length, with a diameter of 9.3 centimeters (3.66 inches) when collapsed. This is impressive considering the sturdy construction and the total height achieved when fully extended. The Pro Lite weighs 1.7 kilograms (89.3% of the total weight), and the Pro Tall weighs 2.0 kilograms (105% of the total weight).
For the standard model’s 9.3 centimeters (3.66 inches) diameter, you’re getting pretty solid storage opportunities. Here at Pack Hacker, we often use the 32-ounce Nalgene bottle as a way to compare water bottle pockets. That bottle is 3.5 inches (89mm) in diameter, so it is slightly skinnier than the Pro Tripod’s width. So, if your Nalgene fits into a water bottle pocket without much fuss, the tripod should fit in there as well. Obviously, the tripod is a lot taller, so you’ll need a compression strap or a way to attach the tripod higher up on your travel backpack, camera backpack, or daypack. However, there are many models available that will work for this purpose without requiring additional accessories.
This might sound counterintuitive, but this isn’t really a travel tripod. It’s a well-designed professional tripod, and there’s a difference. Most users looking for a travel tripod won’t want something this large and heavy, and they likely won’t need all the features that this tripod offers, either. If you’re a pro and need a tripod to use at home and on the road, this performs incredibly well. If you’re a hobbyist looking for a travel tripod, it’s likely overkill. This model is still a great option if you have the space, but you can likely spend less on something that has just the features you need and takes up less space. For the traveling professional, or someone who aspires to be one, this is a great option.
Quick Comparison
Our staff writer has been using the Neewer LT32 62″ Carbon Fiber Travel Tripod for half a year. We’ll start by saying that we know this tripod isn’t nearly as nice as the Peak Design Pro Tripod, but there are a few similarities that are worth noting.
The Neewer tripod is slightly smaller when collapsed, significantly lighter than the Peak Design tripod, and still reaches a solid height of 62 inches (157 centimeters). The Peak Design model has a few inches on the Neewer, but the Neewer is a lot easier to travel with if you aren’t bringing a bag just for camera gear.
The Peak Design head is miles better and has extra features and add-ons that will make your life easier. Still, the Neewer head functions well and offers all the features that most photographers require. It slides more after you tighten the head; it’s a little harder to work with, and setting your camera at an angle isn’t as easy as the Peak Design head, which is one of the best that we’ve ever used.
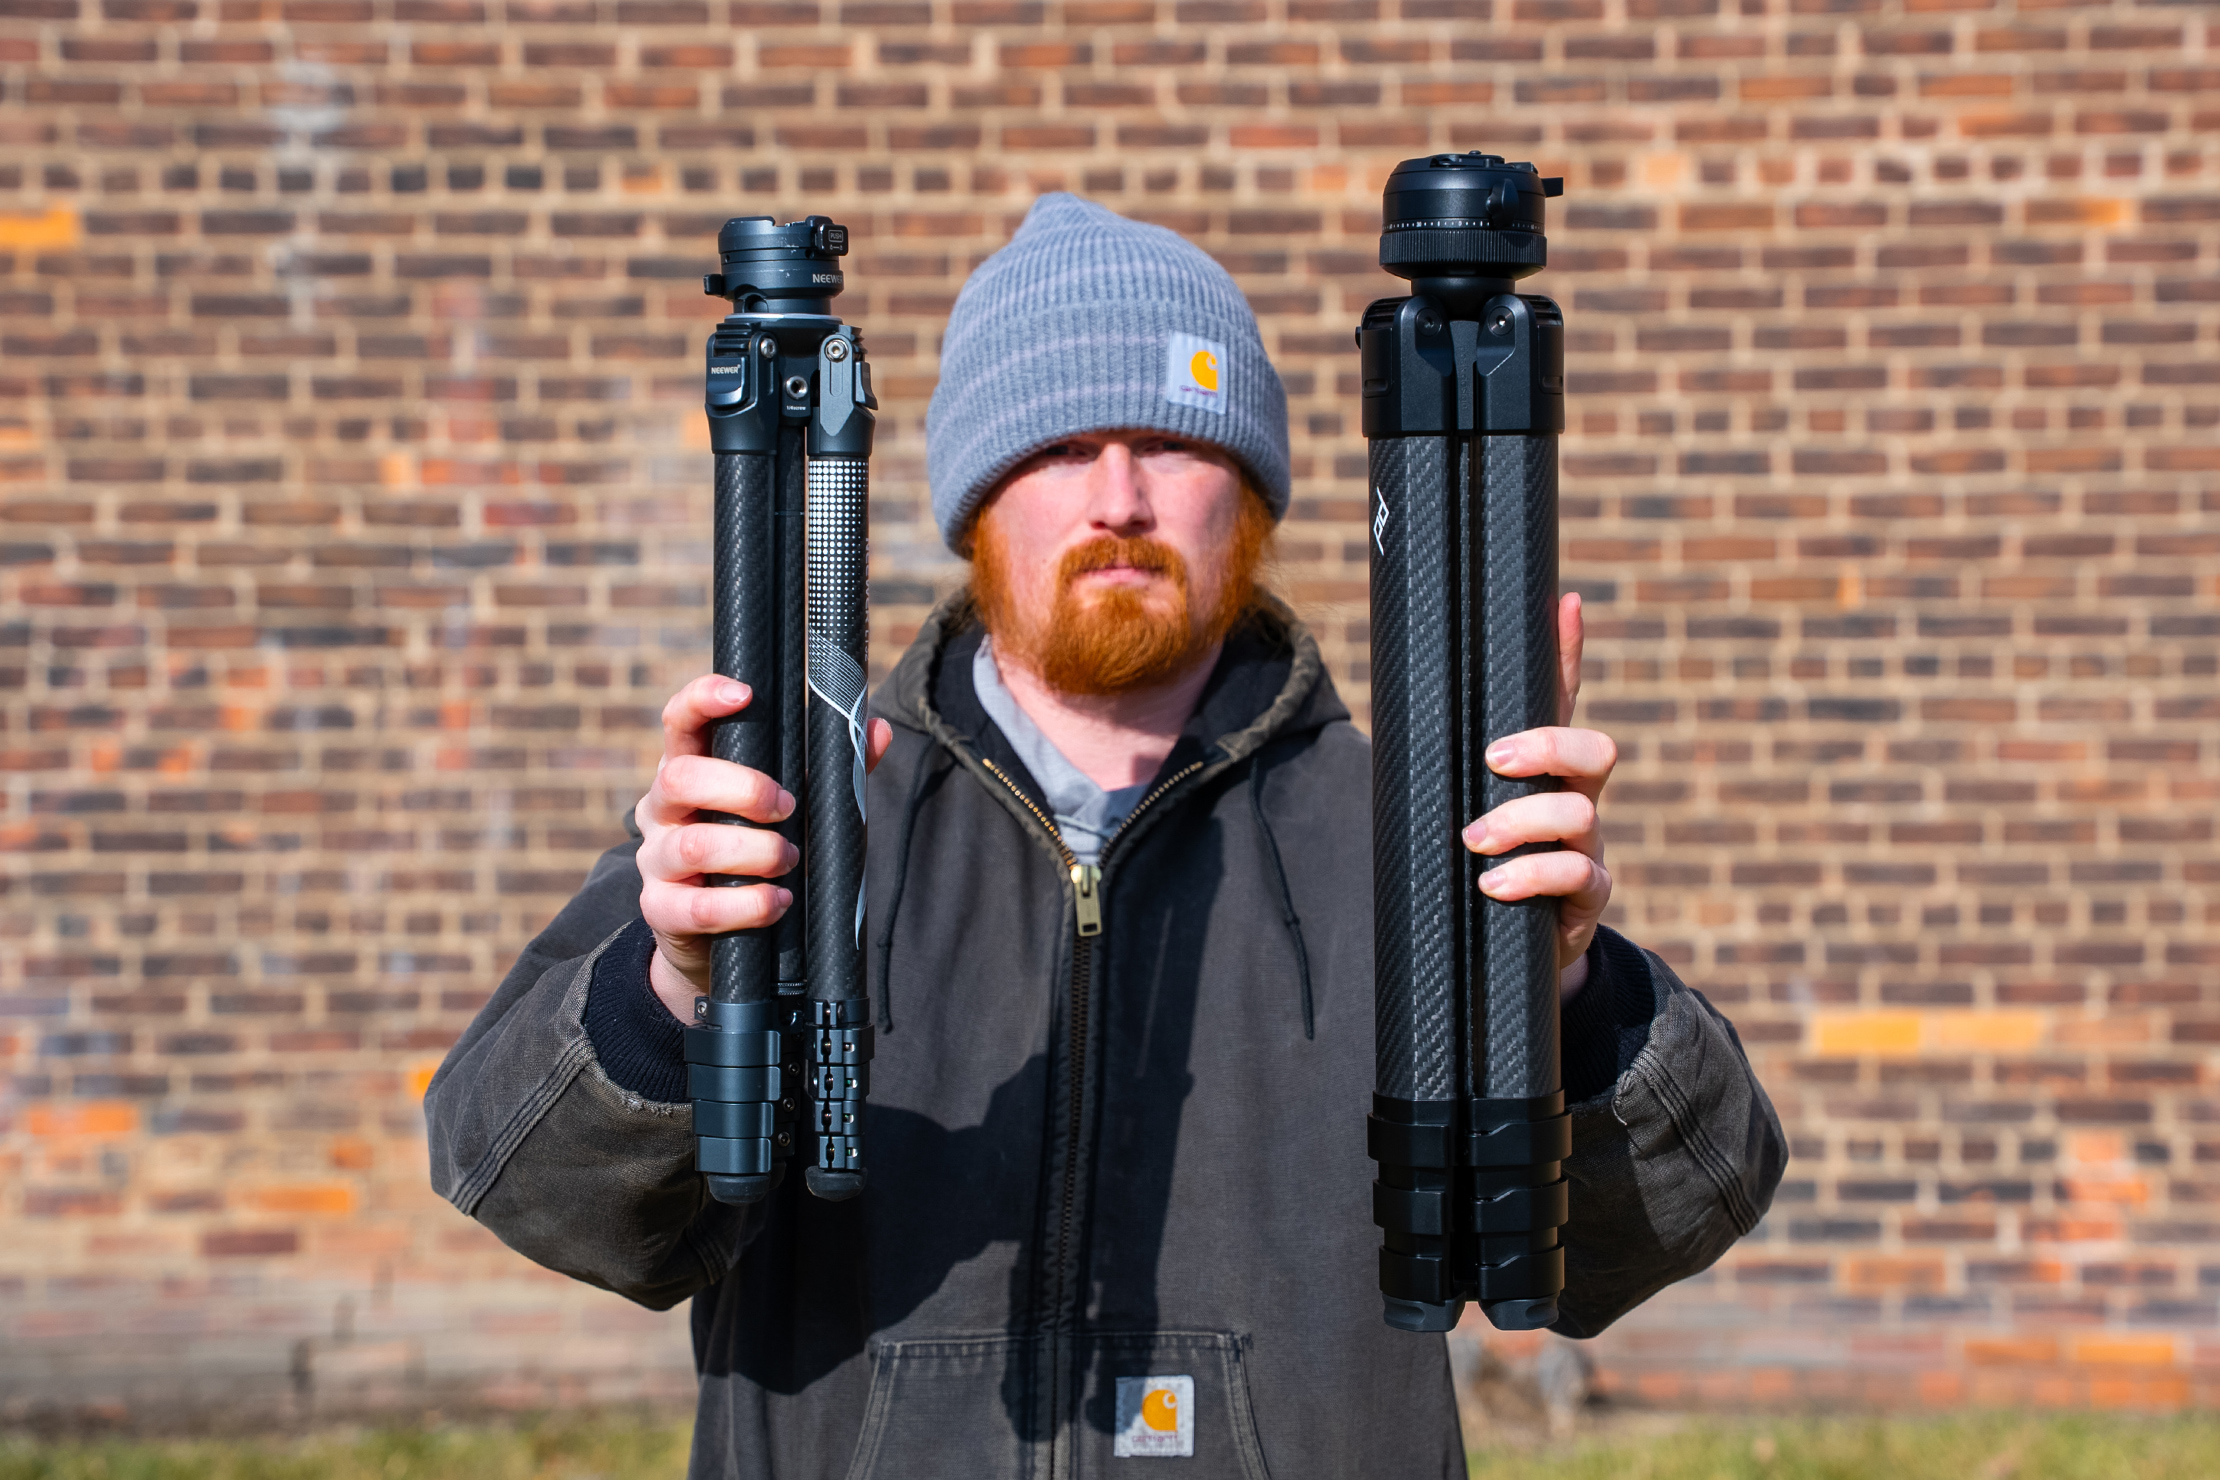
Overall, both of these tripods work great. They’re both relatively easy to travel with and reach solid heights, with the Peak Design beating the Neewer in most categories. So, what gives? The Peak Design Pro Tripod costs $900, while the Neewer is $200. That’s 4.5 times more, or $700. You can get a professional lens for that. Or, you can buy a solid entry-level used camera body and lens for that. Not every traveler will need (or have the money to) spend $900 on a tripod. If you can and want to make your life easier, should you? Why not? But for those looking to save some money or get into the hobby, the Neewer tripod will work just fine. After you’ve mastered that and want something more (and make a ton of money off photography), invest in the Peak Design Pro Tripod; it’ll undoubtedly be a better experience!
Usage Timeline
Condition:
- No issues with the carbon fiber, aluminum, or stainless steel
- The head is just as tight as it was when we got it—no problems to report
- The case has held up well, too
Condition: Excellent
- It still operates like it is brand new
- No knicks, scuffs, or scrapes to be found
- The feet have held up better than we expected, even after use on rough surfaces


Get your questions about the Peak Design Pro Tripod answered from our team and the Pro Community right here on the page. Plus, join discussions with other members about gear, guides, and more.
Join Pack Hacker Pro or, Sign In